If you are not familar with Web Services, here are detailed step by step screenshots (15 in all) that will get you up to speed.
You may have Visual Studio .NET or Visual Studio .NET 2003 or Mono MCS. And with these steps you can get a web service up and running at least on Win2k, WinXP, or Win2003. See story for details…
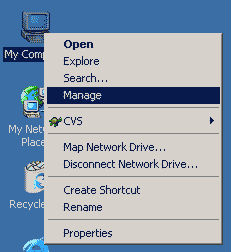
First of all, a few Windows Services need to be running in order to get the built in IIS 5.0 or IIS 6.0 web server up and running. Start by right-clicking My Computer on the Desktop and then select Manage.
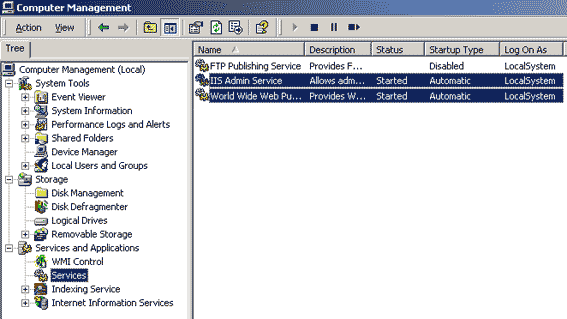
This is the Management Console and you’ll find which services are running by looking under [Computer Management] -> [Services and Applications] -> [Services]. The two important services that need to be running are the IIS Admin Service and World Wide Web Publishing. Either can be set to Automatic or Manual. Both need to be started. IIS Admin Services is a dependency of WWW Publishing. If you have WinXP Home Edition, you will need to install IIS. I’ll refer you to this tutorial [IIS on WinXP Home].
If you have Visual Studio .Net the next several steps are automatically done for you using the ASP .NET wizard. If you don’t have Visual Studio .Net then a virtual directory needs to be setup in IIS that looks like the following. I’ll show you the steps in detail next.
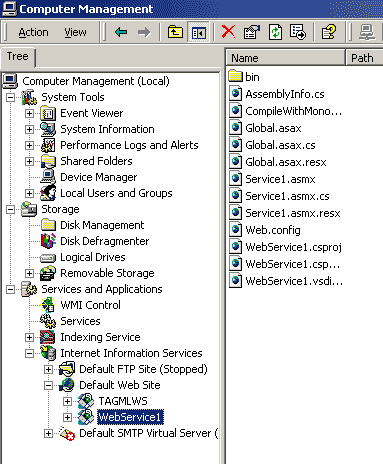
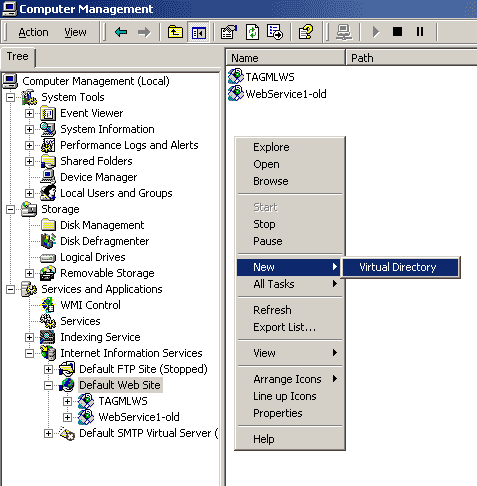
First of all, you need to create a directory which is going to hold your Web Service source files. The ASP .NET Web Service defaults to making a directory in C:/Inetpub/wwwroot/WebService1 for you, but since this is a virtual directory, you can put it anywhere the web server has access to (stick to something on the web server’s harddrive). With your destination directory created, go into the Management Console under [Computer Management] -> [Services and Applications] -> [Internet Information Service] -> [Default Web Site]. Right-click the white space in the right panel and select [New] -> [Virtual Directory]. Note: Default Web Site is created by default, but if it has been deleted you may need to create it.
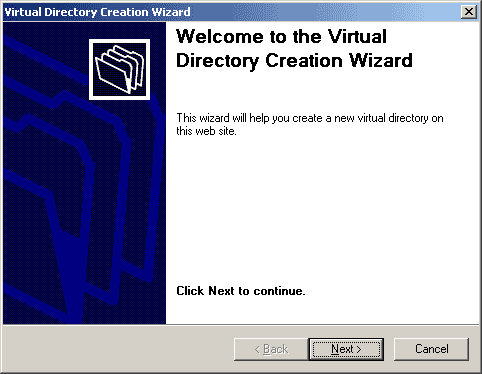
Just click Next.
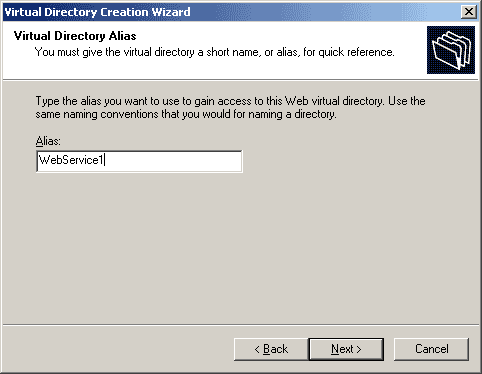
The ASP .NET Web Service defaults to using “WebService1” but you can use any name here that describes your web service. Keep in mind that this name will be used in the code of future clients. Then click Next.
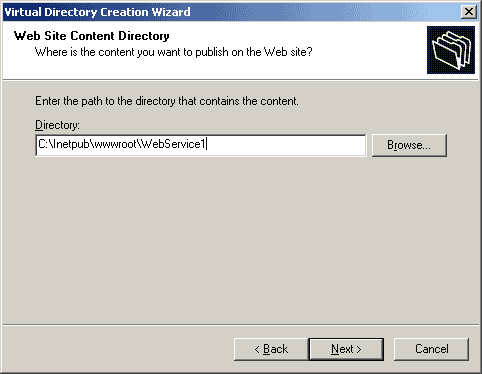
Specify the directory that you created to hold you source files. Then click Next.
To be able to run your web service code you only need [Read] and [Run scripts] checked. Consider security risks if you check the others. Then click Next.

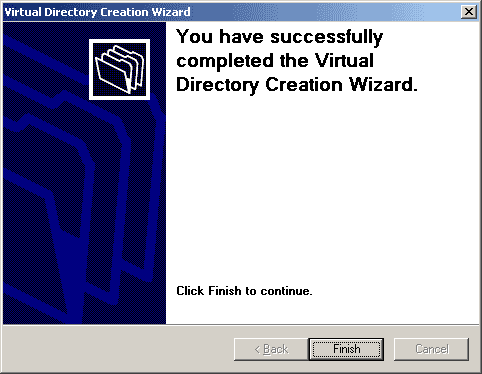
Just click Next. And your virtual directory is created. Remember these steps are automatic using the ASP .NET Web Service wizard. So if you are using the wizard, let do the above steps for you. Otherwise, it will complain that the virtual directory already exists.
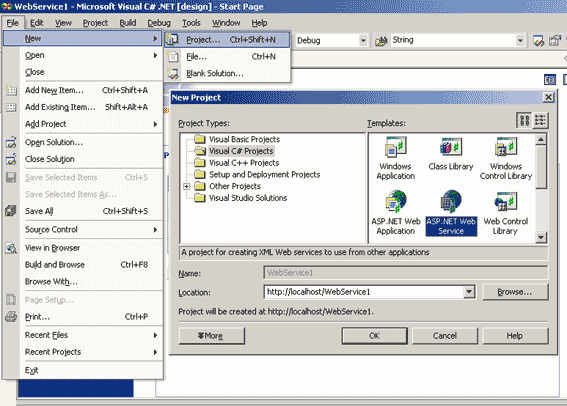
To run the ASP .NET Web Service wizard go into Visual Studio .NET. Click [File] – > [New] -> [Project]. Click [Project Types] -> [Visual C# Projects]. Click [ASP .NET Web Service]. The location will default to WebService1. Then click OK.
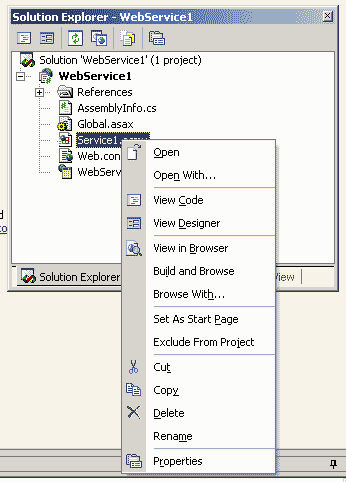
The wizard will complete the setup process and auto-generate source files that are added to the project solution. At this point the web service will compile, although there won’t be any methods until you alter the source. Right-click [Service1.asmx] and select [View Code].
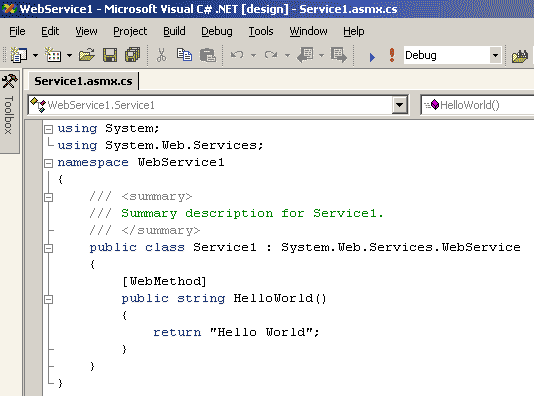
The code below is all the code you’ll need to successfully add your first method to the web service. The [WebMethod] attribute allows the compiler to auto generate the XSDL and XML you’ll need to interface this server with a client later. Add yourself a web method and compile the code.
If you don’t have Visual Studio .NET you can jump to this step. And the bottom of this page is a link to download the source files. Unpack the files in the default directory c:/inetpub/wwwroot as indicated by the earlier steps. Follow the steps to create the virtual directory that will point to these files. Assuming you have installed Mono and the bin directory of Mono is in your path, you will be able to run the included Script labelled [CompileWithMono.cmd]. This will let you compile any modications you make to the [WebMethods] that you plan to add to the web service.
At this point, your web service is created. All you need to do is either hit F5 to step through the code (using break-points) or execute the application which will launch the default browser and bring up the web service main page. This page lists all the [WebMethods] you’ve added to the web service. All the methods here can be called from a web reference in a web client app you may choose to write later.
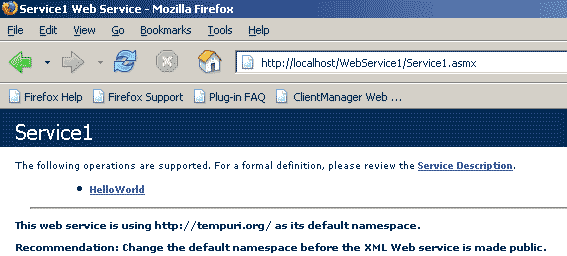
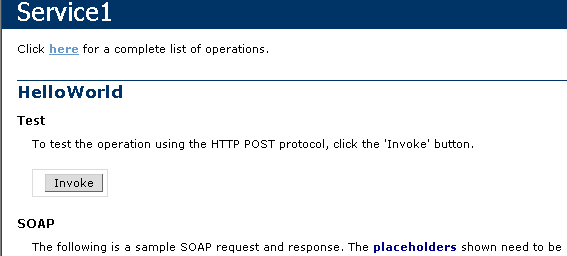
For example, here is the HelloWorld method we just added. This page describes the input and output for the method using SOAP or HTTP POST. All this information is auto-generated for you by simply using the [WebMethod] attribute from the previous step. Since the web service was called from localhost, the invoke button appears to call the method.
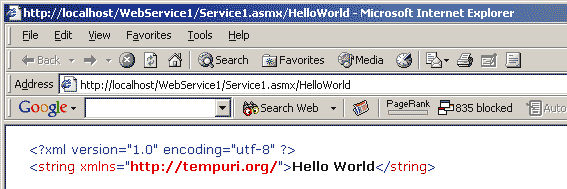
By invoking the method, the parameters (if any) are sent to the method and the results are returned. The resulting page is all nicely defined XML.
You can download the [project files] associated with this tutorial. Included in the project files is a script called CompileWithMono.cmd which depends on you having Mono installed. If you don’t have Visual Studio .NET you will need to compile with the Mono script.